This tutorial teaches you how to deploy a Rails application on Oracle Cloud with Kamal, covering everything from instance creation to publishing, with real examples.
Prerequisites
- Active account on Oracle Cloud Infrastructure (OCI)
- Docker installed locally
- Kamal installed locally
gem install kamal - Rails application ready for production
If you don’t have an account yet, go to the Oracle Cloud website and follow the registration process. The Free Tier offers free resources for testing and learning.
1. Creating your instance on Oracle Cloud
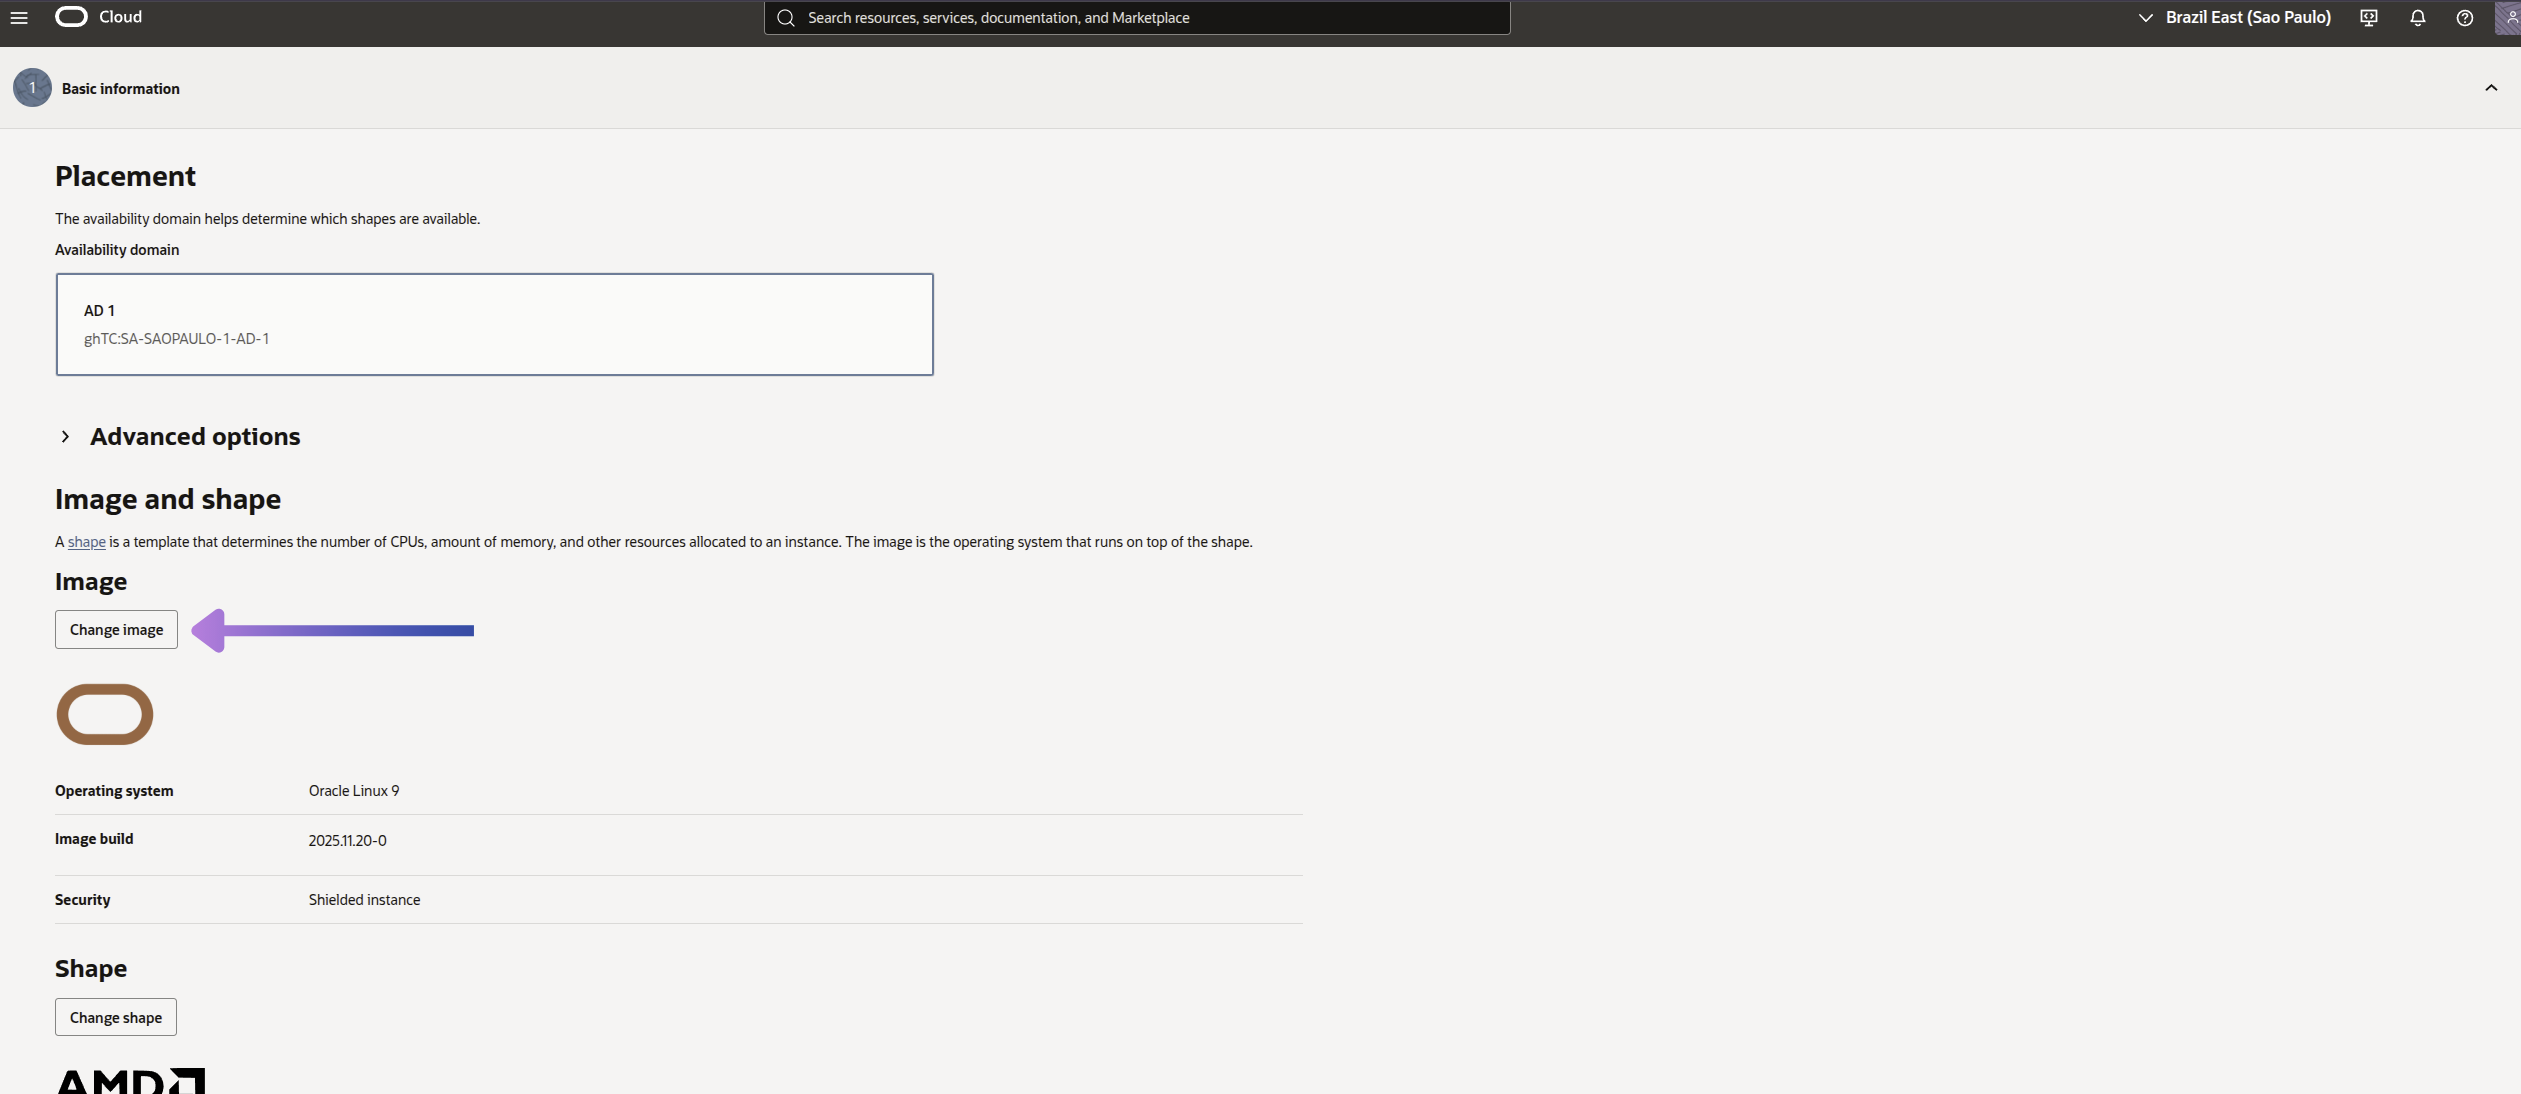
In the Oracle Cloud dashboard, navigate to Compute > Instances and click Create Instance. Choose the operating system (I recommend Ubuntu 24.04 Minimal), set a name for easy identification, and follow the instructions to generate and add your SSH key.

At this stage, you can choose the architecture type (AMD or Intel), the operating system, and the machine type (virtual or bare metal). For most web projects, a standard VM is sufficient.
If you want to use another operating system, click Change image to select a different image.
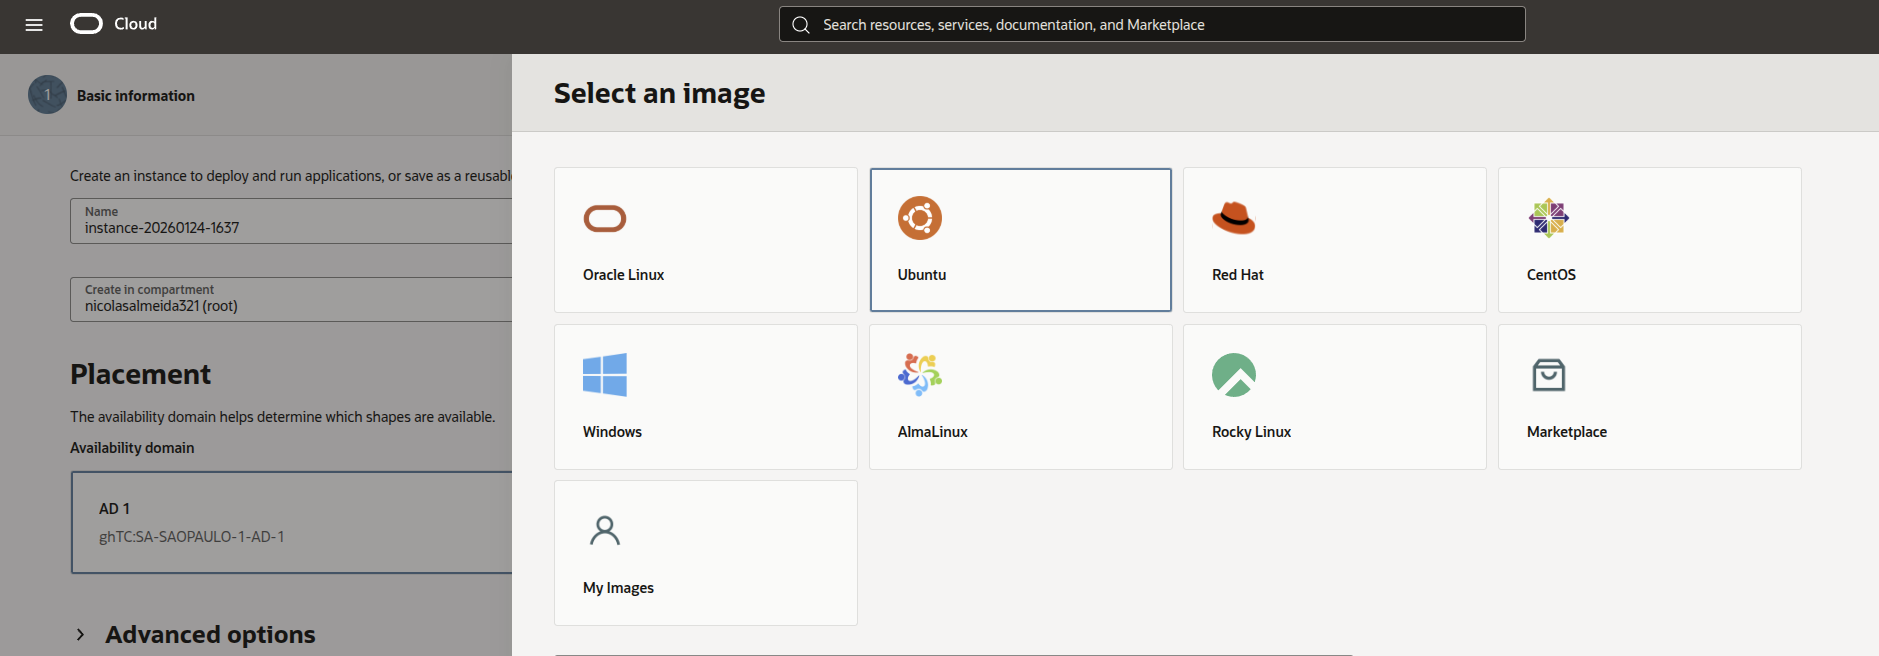
In the images section, select Ubuntu, the version used for this tutorial.
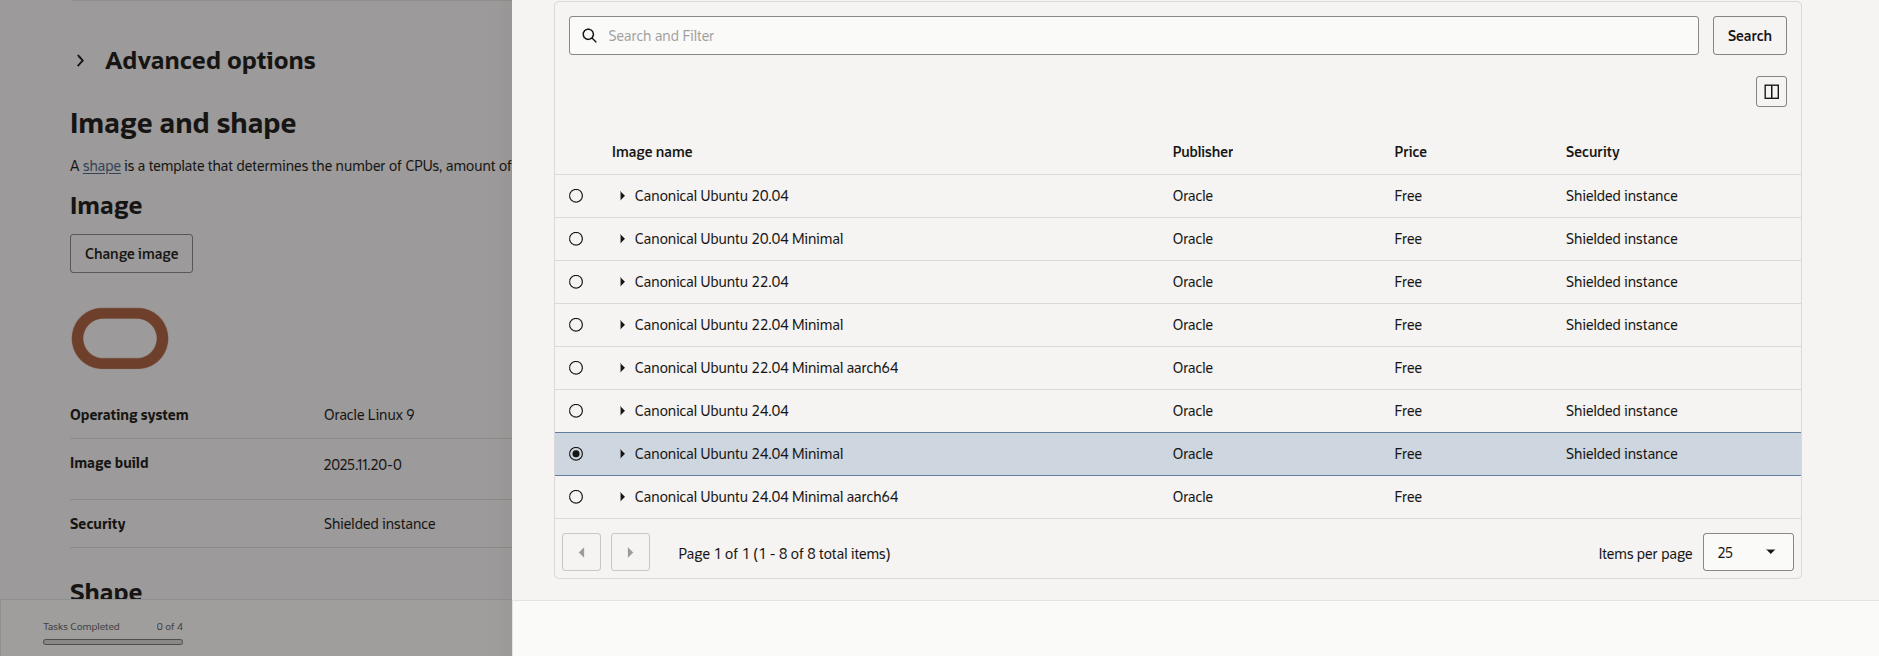
For image name, I recommend using Ubuntu 24.04 Minimal, as it is lightweight, stable, and ideal for servers. After selecting, set a name for your instance to make it easier to identify in the dashboard.
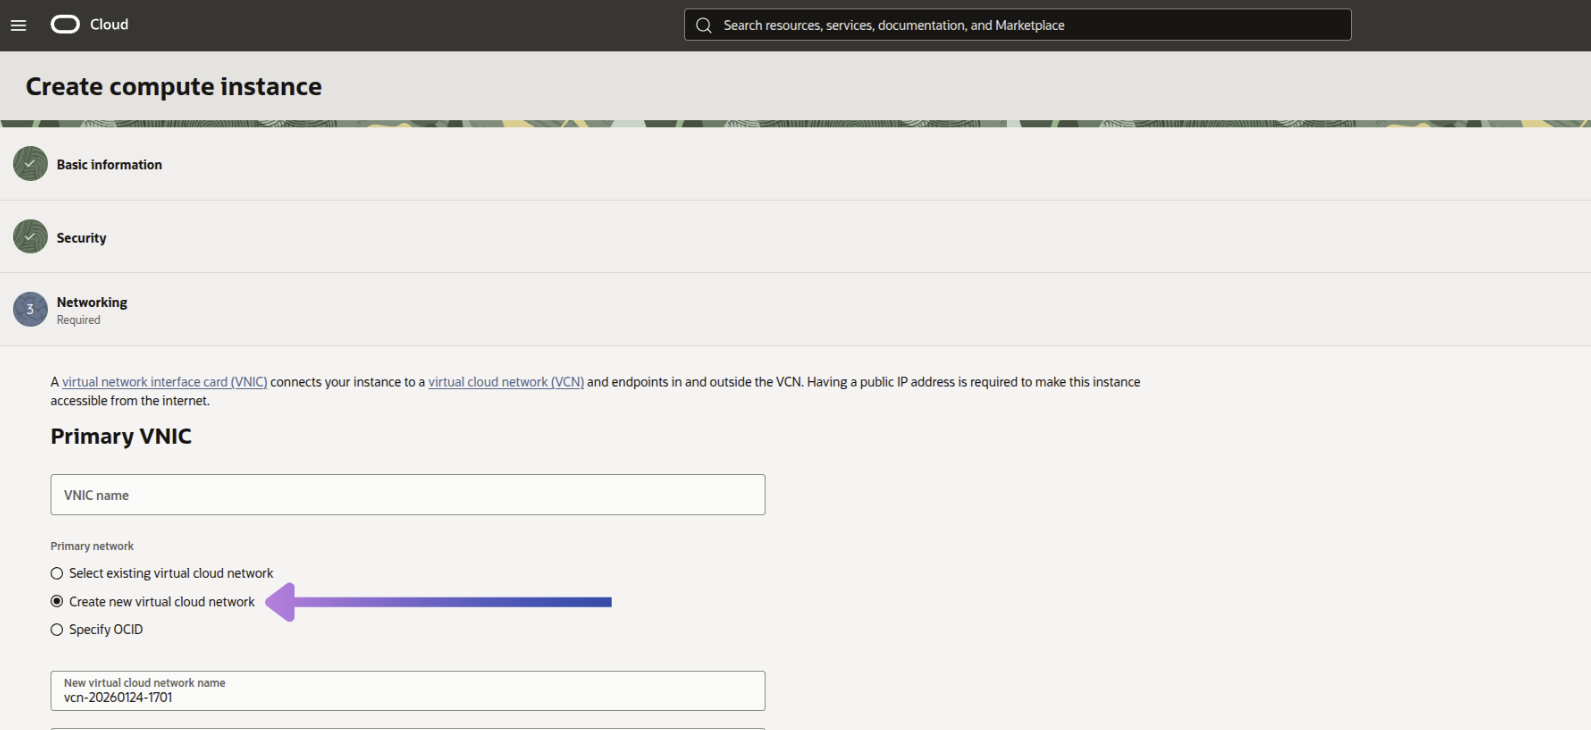
1.1. Configuring the network
Create a Virtual Cloud Network exclusively for your instance.
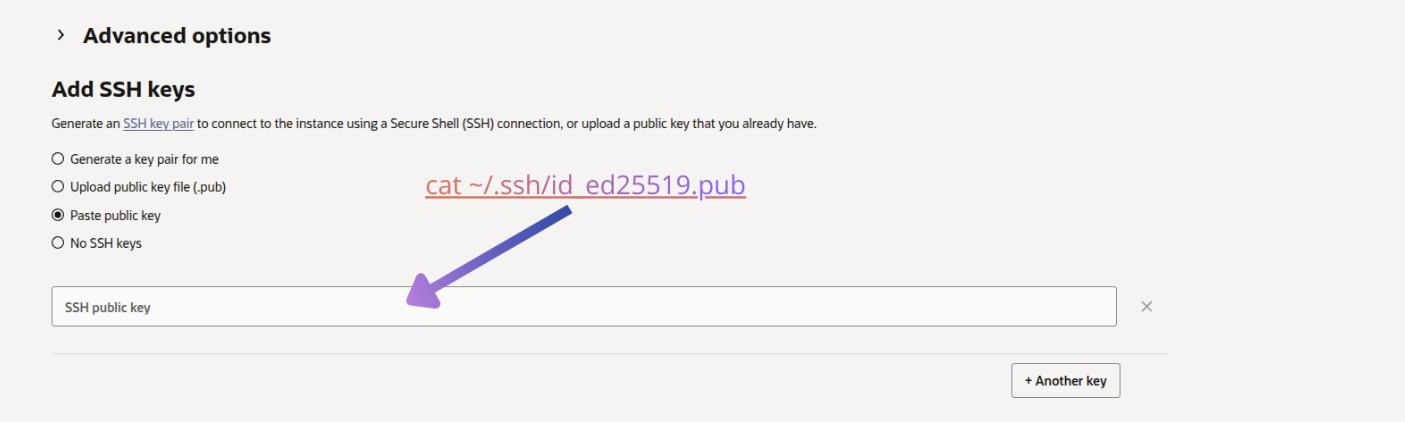
1.2. Generating and adding the SSH key
To securely access your VM, generate an SSH key on your local computer:
ssh-keygen -t ed25519 -C "oracle-cloud"Press Enter to accept the default location and, if you wish, set a password for the key (or leave it blank). This will create two files: a private key (which stays on your computer) and a public key (which will be registered on Oracle Cloud).
To copy the public key, use:
cat ~/.ssh/id_ed25519.pub
Example SSH key:
ssh-ed25519 AAAAC3NzaC1lZDI1NTE5AAAAIFakeExampleKeyData1234567890 oracle-cloud
Still in the Networking step, paste the public key in the indicated field during instance creation. This will allow only those with the private key to access the server via SSH, increasing security.
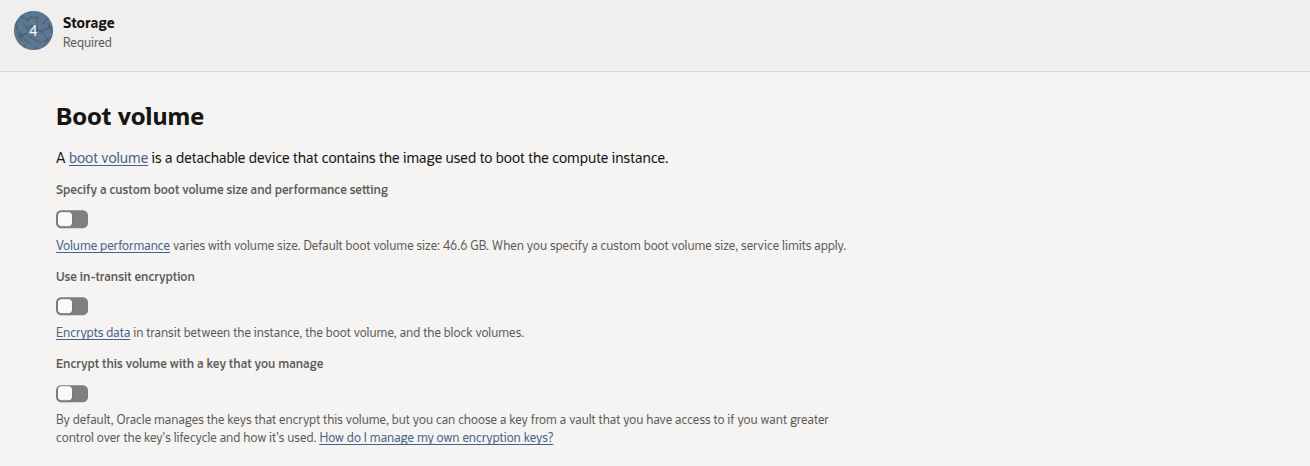
1.3. Configuring the Boot Volume
The Boot Volume is your VM’s main disk. For this tutorial, keep the default options, without customizing size or advanced encryption. This simplifies the process and is sufficient for testing and initial projects.
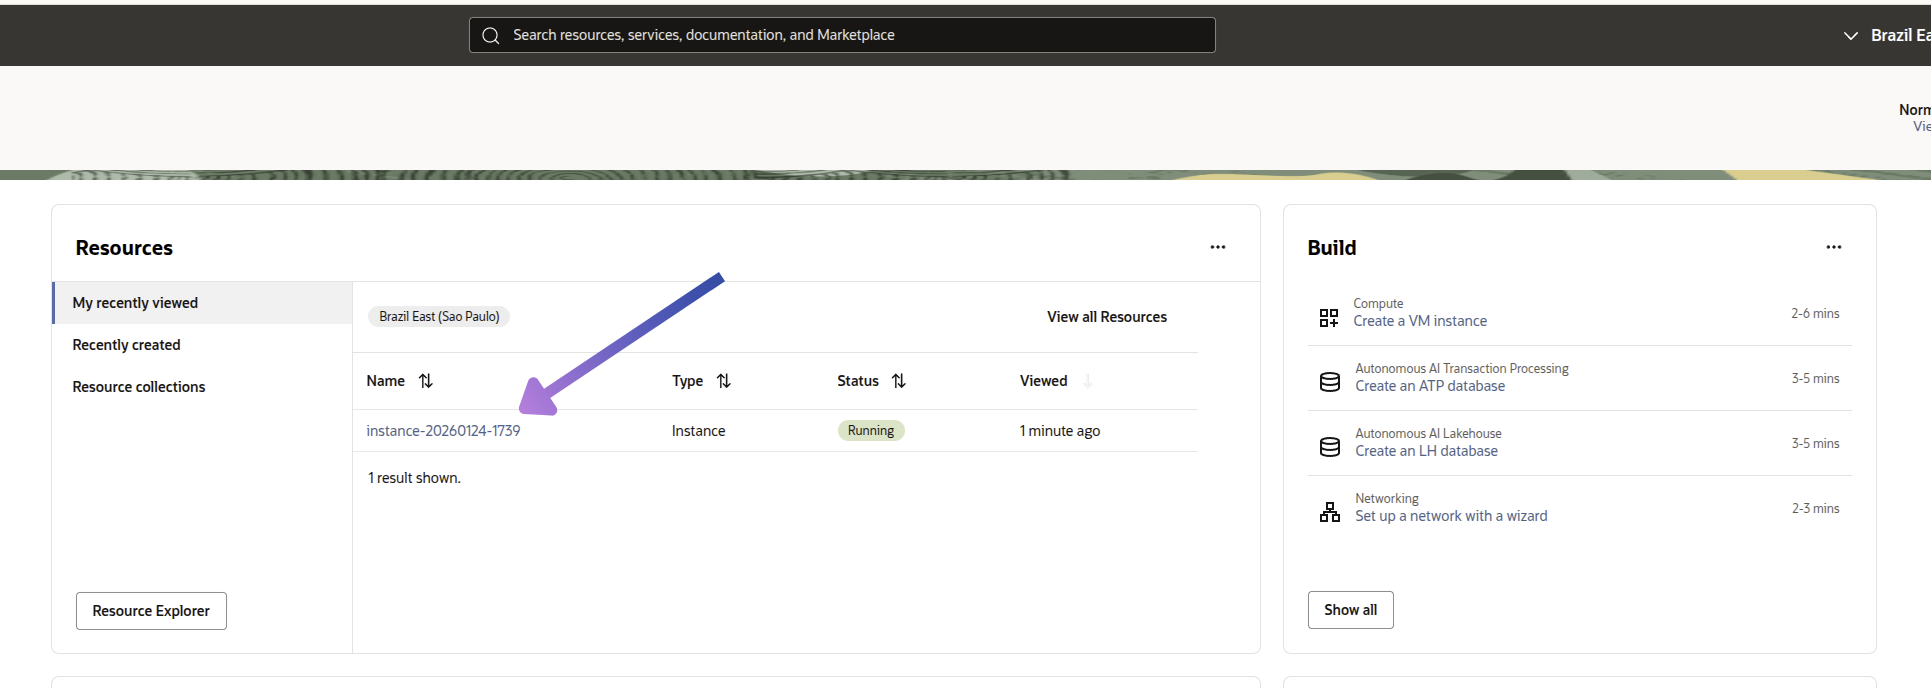
Before finishing, review all instance settings. If necessary, adjust resources such as CPU, memory, and storage according to your application’s demand and finalize the creation of your virtual machine.
2. Reserving the public IP
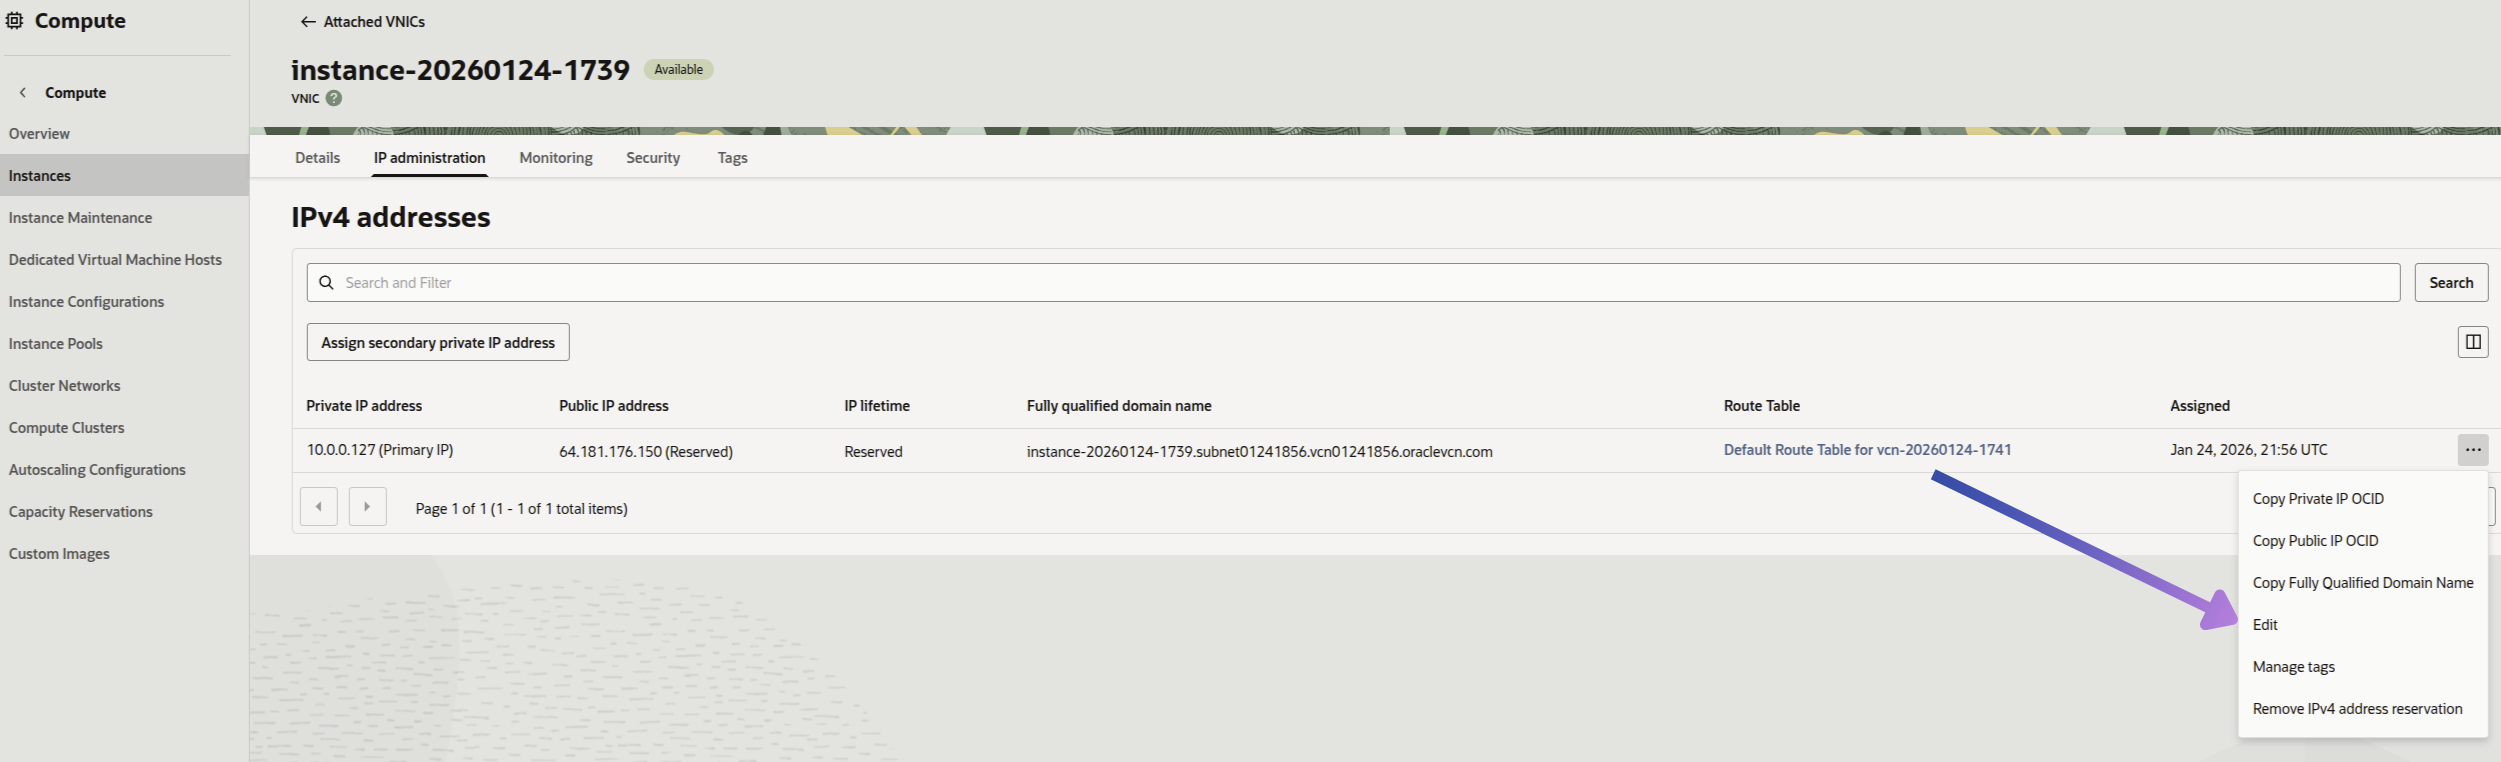
Make sure your instance has a public IP. To do this, access your instance and, in the Networking menu, select IP Administration. Then click Edit and check the options to reserve and associate the IP with your VM.
In the Networking menu, click on the network associated with your VM.
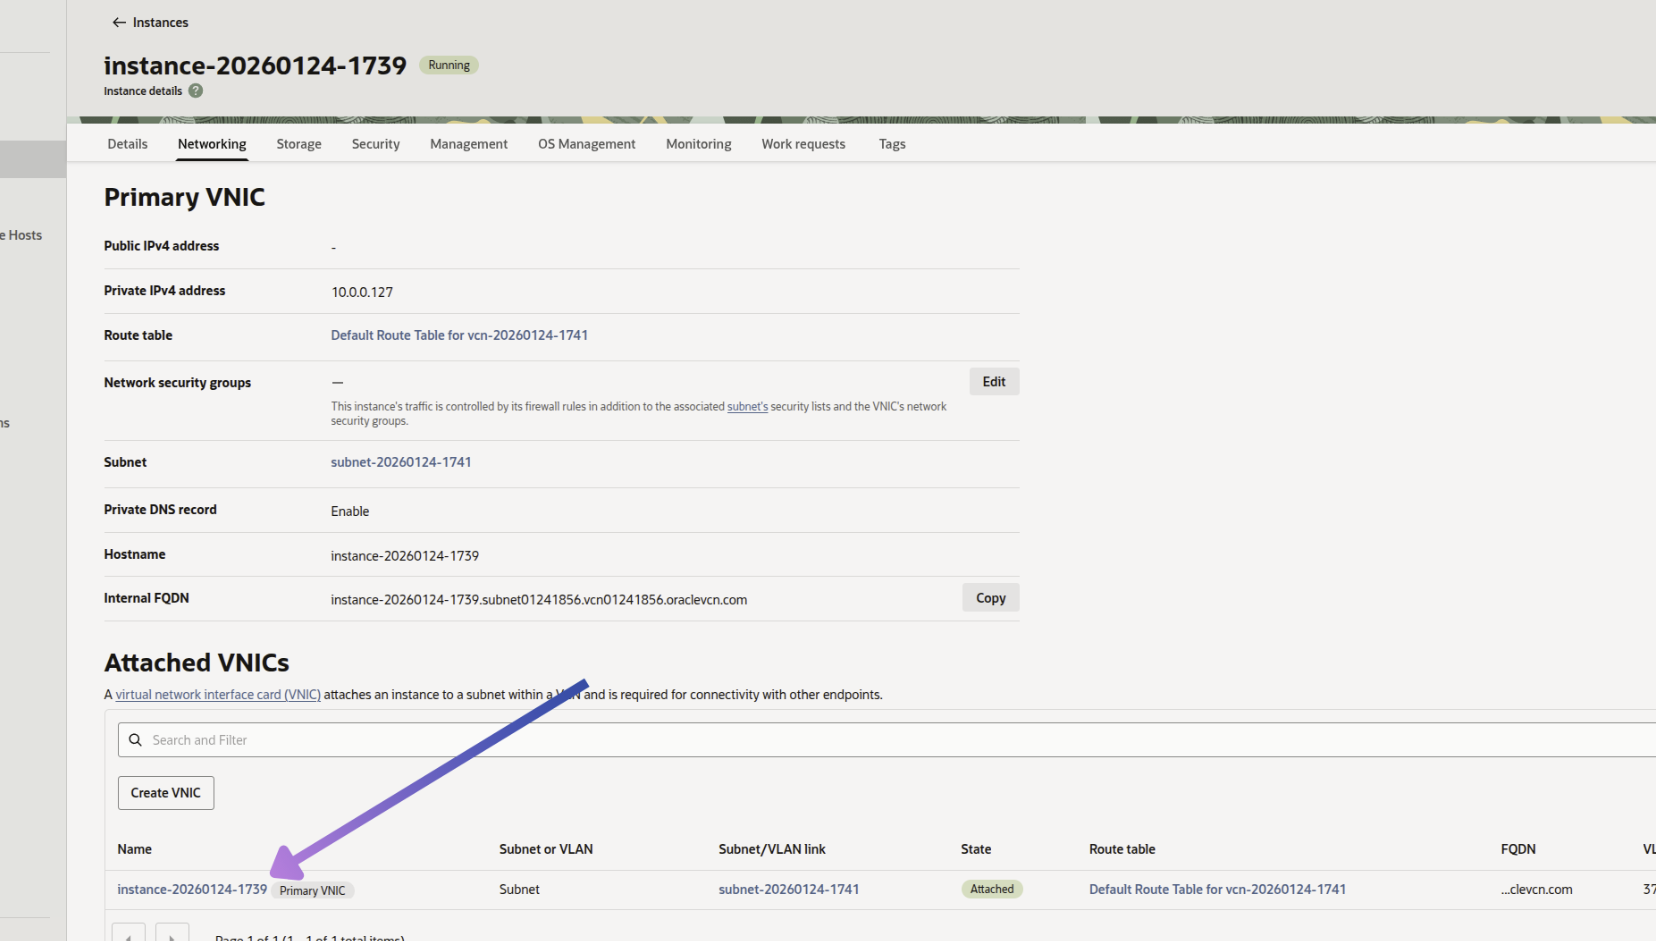
In IP Administration, click Edit to ensure an IP address for your instance.
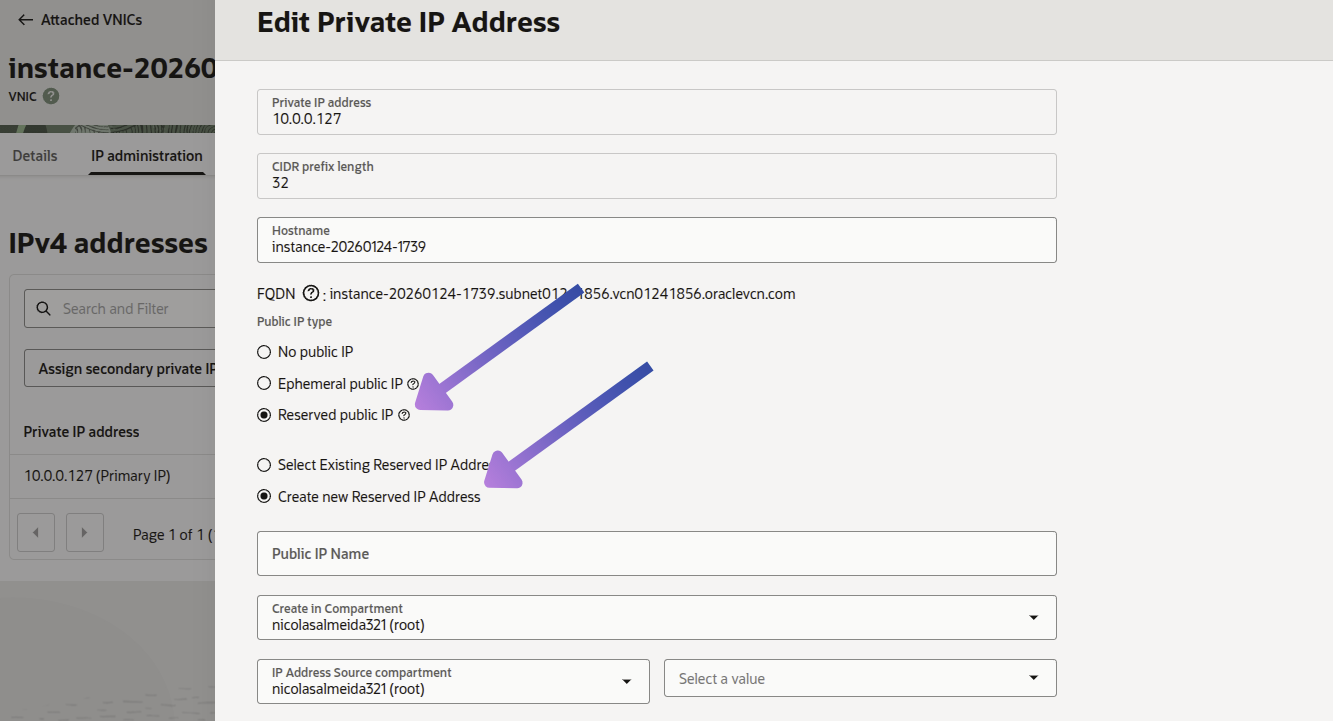
After accessing Edit, check the options Reserved public IP and Create new Reserved IP Address. This way, your VM will have a dedicated public IP.
2.1 Opening ports
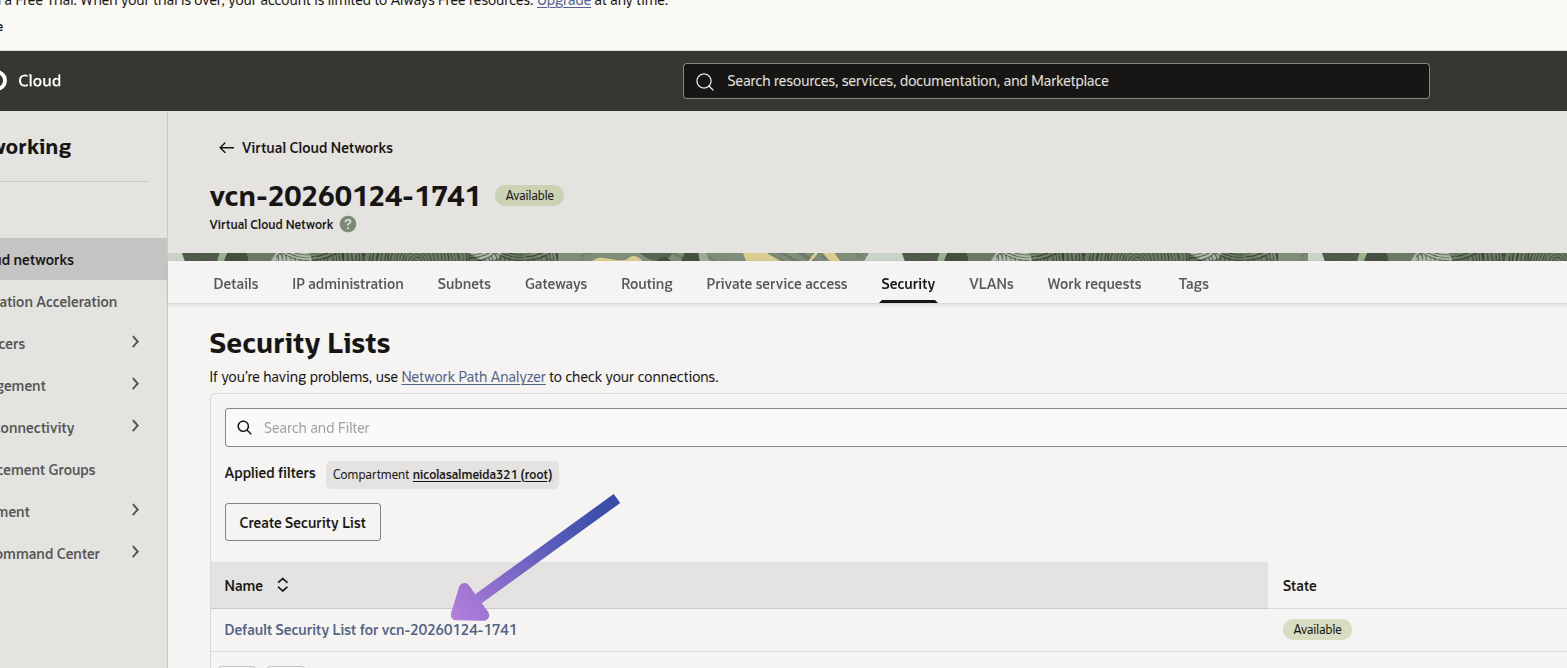
For your web application to be accessible, you need to open ports 80 (HTTP) and 443 (HTTPS) in the network firewall. In the Oracle Cloud dashboard, go to https://cloud.oracle.com/networking or search for Virtual Cloud Networks.

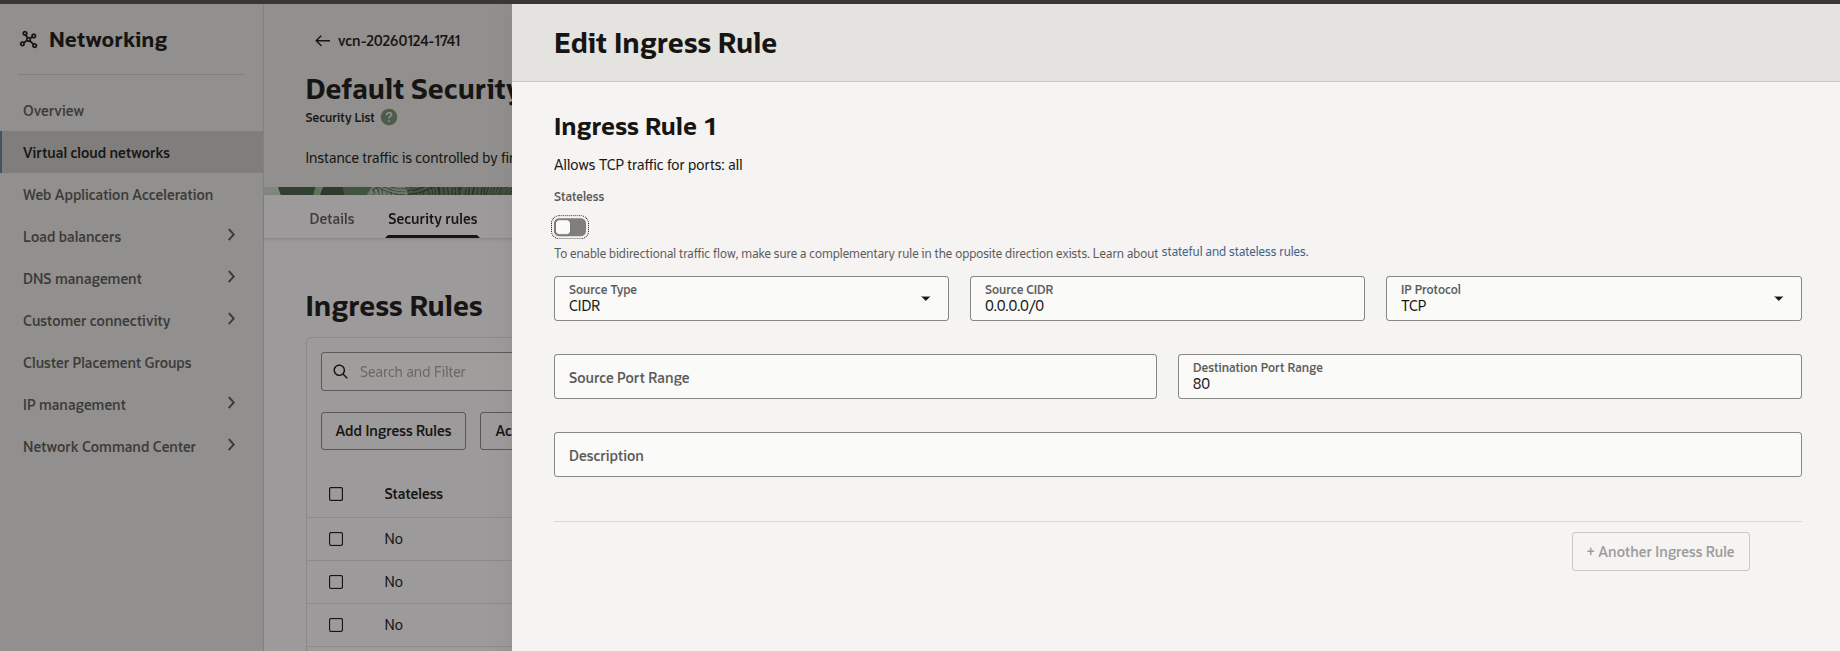
Click on your virtual network and go to Security Lists. Edit the default list and add ingress rules for ports 80 and 443, allowing traffic from any source (0.0.0.0/0).
Go to the Security Rules tab and add ports 80 and 443:
To access the machine, run: ssh ubuntu@your_instance_public_ip
Done! Your instance is configured to accept external traffic and ready to receive your application deployment.
Deploying a Rails application with Kamal
With the instance configured and accessible, you can proceed to deploy your Rails application using Kamal. Make sure your application is production-ready and follow the steps below.
1. Preparing the environment
To perform the deployment, Docker must be installed on the virtual machine. Since we don’t have root access on Oracle Cloud, you’ll need to manually adjust the server before using Kamal.
Run the following commands via SSH on the virtual machine:
sudo apt update
sudo apt upgrade -y
sudo apt install -y docker.io curl git
sudo usermod -a -G docker ubuntu
These commands will update the system, install Docker, curl, and git, and add the ubuntu user to the docker group to allow command execution.
With Docker installed and the ubuntu user added to the docker group, you’ll have all the necessary dependencies configured to deploy your Rails application.
1.2. Configuring Kamal and deploying
In your Rails project directory, generate Kamal’s configuration file deploy.yml and adjust the main parameters:
service: my_application
image: my_application

servers:
  web:
    - YOUR_INSTANCE_IP

registry:
  server: localhost:5555

env:
  secret:
    - RAILS_MASTER_KEY

ssh:
  user: ubuntu

proxy:
  ssl: false
  host: YOUR_INSTANCE_IP

asset_path: /rails/public/assets
builder:
  arch: amd64
Replace YOUR_INSTANCE_IP with the reserved public IP.
If using a domain, update the host field and set ssl: true.
Keep the user as ubuntu.
With everything configured, run the command below to start the deployment.
kamal deploy
Production application examples
-
FitPlan
Platform for personalized workout and diet plans. Used as the basis for this tutorial. -
Boardgame Explorer
- Demo project for the bgg_remote gem, easily integrating with the BoardGameGeek API.
- github: boardgame_explorer
Useful links and documentation
- Oracle Cloud — Main page to access and create cloud resources.
- Oracle Cloud Documentation — Official guide for all Oracle Cloud services.
- Docker Documentation — Official guide for installing and using Docker.
- Official Rails Guide — Documentation to get started with Ruby on Rails.
- Kamal Documentation — Complete guide for deploying with Kamal.